
Where case-erector downtime comes from
A case erector spends its cycle pulling a flat blank from the magazine, opening it into a tube, folding the bottom flaps and sealing the bottom before pushing the case to the loading station. Each of those motions has a wear part or an adjustment that can fail: a suction cup cracks, a vacuum filter clogs, a folder spring weakens, a glue nozzle gums up, or a guide drifts out of alignment. Most stoppages are not mysterious breakages; they repeat a small set of faults that show up the same way every time, and they are resolved by checking the likely cause in order rather than by reaching for the first worn part in the spares box.
This guide splits erector maintenance into three parts: a fault-diagnosis table for the symptoms operators and line staff actually report, a step-by-step size changeover procedure with realistic time bands, and a preventive maintenance schedule by interval. It assumes a standard inline automatic erector running RSC or regular slotted carton blanks; hot-melt, tape and self-locking builds are covered where their seal faults differ. For the machine architecture behind these checks, the how an automatic case erector works guide walks through pick-off, plunger forming, flap folding and sealing in detail.
How to read a fault on the line
Before opening a panel, record what the machine is telling you. Note the HMI fault code, which station stopped, whether the failure repeats on every blank or only some, and whether a specific case size or board grade triggers it. Check the simplest signals first: air pressure at the regulator, vacuum level on the gauge or HMI, adhesive temperature on glue builds, and whether a guard or interlock opened during the stop. A fault that appears only after a changeover usually points to an adjustment carried over from the previous size; a fault that appears after weeks of stable running usually points to wear or a consumable reaching end of life.
Clear safety rules apply to every intervention. Stop the cycle, isolate electrical and pneumatic energy before reaching into a station, and do not bypass an interlock to clear a jam. On glue builds, follow the melter bleed and cool-down sequence before touching hoses or nozzles. Replace any guard opened for service before returning the machine to production, and record the fault and the fix in the downtime log so recurring stops can be reviewed.
Pick and feed faults
| Symptom | Likely cause | Check and fix |
|---|---|---|
| Blank not picked; vacuum alarm trips | Cracked or worn suction cup; cup seating surface hardened; cup misaligned to the blank | Inspect the cup for splits, flattened lip or wrinkles; replace if worn. Re-seat the cup to the blank face and confirm pick-arm height and angle match the magazine position. |
| Vacuum weak or intermittent even with a sound cup | Clogged vacuum filter; leaking hose or fitting; vacuum pump or generator loss | Clean or replace the vacuum filter element; check hoses for cracks and fittings for leaks; verify pump output against the machine specification. |
| Blank drops partway to the forming station | Magazine lift pressure too low; platform spring or air lift weak; feed guide binding the stack | Adjust magazine lift pressure to the spec; inspect lift spring or air cylinder; clear guides so the stack rises freely without catching. |
| Two or more blanks picked together | Worn separation brush; weak air knife; board caliper thicker than the feed setting; guides too wide | Reseat or replace the separation brush; check air knife flow; verify board thickness against the machine range; narrow feed guides to the blank stack. |
| Blank skews as it leaves the magazine | Blank curled or damp; static between sheets; feed rollers or guides uneven | Condition board to plant humidity; check static elimination on dry board; level the feed guides and rollers so the blank enters straight. |
Suction cups are the first wear part to inspect on any pick fault. A cup that looks intact from the outside can have a split lip that loses vacuum under load, so replace cups on condition rather than waiting for a total pick failure. Keep a matched set on site and note the cycle count at replacement so the cup life can be tracked against the machine’s actual duty.
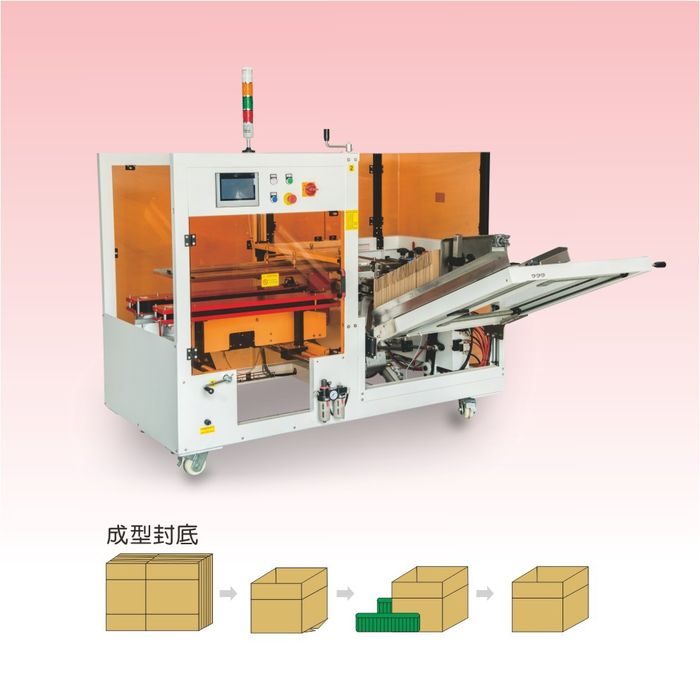
Forming and squareness faults
| Symptom | Likely cause | Check and fix |
|---|---|---|
| Case comes out skewed or not square | Squaring frame out of adjustment; plunger timing off; side belts tracking to one side; worn guide bearings | Re-check squaring against a square or reference case; adjust frame position and plunger timing; center belt tracking; inspect bearings and replace rough or loose ones. |
| Case jams inside the forming section | Flap fold timing mis-set; guide clearance too tight; damp or distorted board; compression pressure too high | Verify folder timing against the cycle; open guide clearance to the blank thickness; check board moisture and flatness; back off compression until the case forms without binding. |
| Inner or outer flap fails to fold | Folder blade timing shifted; folder spring weak or broken; folder actuator or sensor fault | Align folder blade timing to the blank approach; replace weak springs; test the actuator and check the flap-detection sensor for a dirty lens or loose connection. |
| Case twists on the outfeed belt | Belt tension uneven; pulley misaligned; discharge speed mismatched to the forming rate | Equalize belt tension; align pulleys; match outfeed speed to the station rate so cases do not bunch or drag. |
| Formed case bulges or collapses at the sides | Blank grade below the required stiffness; size range at the machine limit; forming pressure insufficient | Confirm board grade and flute suit the case weight; check the blank is within the rated L/W/H range; raise forming compression within the specification. |
Squareness problems that appear after a size change usually mean a guide or frame was not returned to spec; persistent squareness drift on one SKU points to worn bearings or an out-of-limit belt. Measure the case against a reference before each adjustment, and document the setting once the case forms cleanly so the next changeover starts from a known baseline.
Seal-quality faults
Seal faults differ by closure method. The tables below separate tape builds, hot-melt glue builds and self-locking bottoms, because the same open case can have different causes depending on how the bottom is closed.
Tape-bottom faults
| Symptom | Likely cause | Check and fix |
|---|---|---|
| Tape peels back; bottom opens after sealing | Tape misaligned over the seam; tension too loose; crash-plate pressure low; tape width unsuited to the board | Center the tape over the bottom seam; increase tension to spec; raise crash-plate compression; confirm tape width matches the flap closure and board surface. |
| Tape wrinkles or bridges the seam | Roll alignment off; uneven tension; dirty or sticky tape guide | Align the roll and head guide; balance tension through the head; clean accumulated adhesive and board dust from the guide surfaces. |
| Tape tail or stringy end after the cut | Brake setting off; cutting blade dull or dirty; guide exit angle wrong | Adjust roll braking; inspect and clean or replace the cutting blade; check the exit guide angle against the manual. |
| Seal fails on dusty or cold board | Board surface prevents adhesion; tape grade unsuited to the plant conditions | Clean the flap contact area; verify the tape adhesive matches the board temperature and dust level; revisit the seal-method choice if tape fails repeatedly. |
Hot-melt glue faults
| Symptom | Likely cause | Check and fix |
|---|---|---|
| Weak bond; bottom opens under load | Bead too thin or missing; melt temperature too low; adhesive grade mismatched; flap pressure insufficient | Check bead width and pattern against the case; confirm melter holds set temperature; verify adhesive grade for the board and line speed; raise closing pressure within spec. |
| Adhesive strings or threads between case and nozzle | Nozzle temperature too high; nozzle tip dirty or charred; adhesive degraded from overheating; bead too heavy | Lower temperature within the adhesive range; clean or replace the nozzle; flush degraded adhesive; reduce bead weight to the minimum that seals. |
| Nozzle or glue filter clogs repeatedly | Char buildup in the melter; moisture or contamination in adhesive; filter past service life | Flush the melter per the procedure; replace the glue filter; check adhesive storage for moisture; schedule nozzle cleaning before char accumulates. |
| Adhesive contacts the outside of the case | Bead position shifted; nozzle height off; spray pattern widened | Re-align nozzle height and pattern to the flaps; check for leaking fittings; confirm the case stops in the correct position under the nozzle. |
Self-locking bottom faults
| Symptom | Likely cause | Check and fix |
|---|---|---|
| Lock does not seat; bottom springs open | Fold plow mis-adjusted; blank die-cut not matching the lock geometry; board too thin or floppy | Re-check plow fold angle and depth; confirm the blank design supports the lock; verify board stiffness for the case and product weight. |
| Case forms but the lock edge tears | Fold radius too sharp; board fiber direction wrong; compression on the lock edge | Adjust fold geometry to a larger radius; check blank layout and flute direction; reduce edge compression so the lock bends without splitting. |
Pneumatic and general mechanical faults
| Symptom | Likely cause | Check and fix |
|---|---|---|
| Machine runs slow; cylinders lag the cycle | Air supply below 0.5–0.7 MPa; filter or regulator restricted; dryer removed or bypassed | Check plant air at the machine inlet; service filter and regulator cartridge; confirm dryer function and drain condensate from the air line. |
| Cylinder drifts or leaks past the piston | Worn piston seals; scored rod; insufficient lubrication | Inspect rod for scoring; replace seal kit; verify lubricator setting and oil grade per the manual. |
| Belt slips, runs off track or shows sidewall cracks | Tension wrong; pulley misaligned; belt aged or loaded beyond rating | Reset tension to spec; realign pulleys; inspect belt ply and replace if cracked, glazed or stretched. |
| Sensor false trigger or missed detection | Lens covered with dust or board fiber; sensor shifted out of alignment; loose wiring | Clean the sensor lens; re-align to the target; check connector and wiring before assuming the sensor has failed. |
| Intermittent electrical stop with no code | Loose terminal; vibration-worn connector; damaged cable near a moving arm | Inspect connections at the control panel and moving stations; secure cables that flex during the cycle; test continuity before replacing a component. |
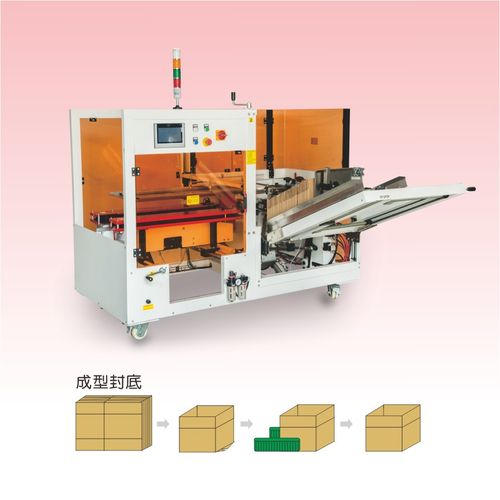
Size changeover, step by step
A changeover that takes longer than it should usually skips planning and trial verification. The procedure below covers a standard inline erector moving from one case size to another, and it applies whether the seal is tape, glue or a lock. Machines with HMI recipes store the mechanical offsets and speed settings; machines without recipes rely on written notes and reference cases.
Before starting
- Confirm the new SKU: case L/W/H, board grade and flute, seal method, target speed and required output.
- Check consumable stock: tape width and roll, adhesive level and grade, or lock-compatible blanks.
- Note the current settings before changing anything, so the previous size can be restored if needed.
- Clear the area around the machine, park tools and spare parts away from the access panels, and keep the energy isolation points reachable.
Mechanical changeover
- Load the stored recipe for the new size in the HMI, or open the written setup sheet for that case.
- Set the magazine width and feed guides to the blank dimensions; confirm the stack lifts without binding.
- Adjust the forming frame width and height, side-belt position and squaring stop for the new case.
- Set the folder plows and closing compression according to case height and board stiffness.
- Set the seal station: center tape heads and confirm tape width, align glue nozzles to the bead pattern, or check the nail clinch position on a nail-type unit.
- Verify guards are seated and interlocks close, then run three to five trial cases through at low speed.
Verification and sign-off
- Check each trial case for squareness, flap fold and seal quality before raising speed.
- Run a short production batch at low speed, then ramp to the target rate; inspect the first 20 cases for skew, open bottoms and seal defects.
- Record the final settings in the machine log, note any adjustment made, and restock consumables for the next run.
- Clear scraps and offcuts from the feed and discharge, confirm all panels are closed, and return the machine to the line.
Realistic changeover time depends on how far the size range moves. A narrow-range tape machine changing between similar cases typically takes 10–20 minutes; a glue or wide-range machine adjusting frames, belts and nozzle patterns takes 20–35 minutes, and a first-time setup for an unfamiliar blank can run longer. On high-mix lines where several changeovers fit in a shift, recipe recall, tool-less adjustments and quick-change parts matter more than raw machine speed; the TCO side of that trade-off is laid out in the case erector cost and payback breakdown.
Preventive maintenance schedule
Planned maintenance splits work by interval. The schedule below is a working template; follow the interval and lubricant grade printed in the machine manual for the specific build, and adjust replacement cycles if the plant runs damp board, dusty product or multiple shifts.
| Interval | Tasks |
|---|---|
| Daily (start of shift or each shift) | Check inlet air pressure and regulator reading; inspect suction cups for cracks or flattening; remove scraps, tape tails and adhesive strings from feed and discharge; sample-check seal quality on formed cases; confirm guards close and e-stops respond; clean sensor lenses; on glue builds, verify melter temperature and adhesive level. |
| Weekly | Clean or blow out the vacuum filter element; inspect belt tension and sidewalls; lubricate guide rails and pivots per the manual; check air hoses and fittings for leaks; inspect folder springs, pins and blades for wear; wipe glue buildup from guards and nozzles. |
| Monthly | Replace or condition-check suction cups against their cycle count; inspect cylinder rods and seals for leakage; align position and flap sensors; check electrical terminals and cable flexing; inspect glue filter and nozzle condition; tighten guard fasteners and check interlock mounting. |
| Quarterly | Inspect drive belts for ply wear and pulley wear; check bearings and pivot points for looseness; grease or replace components per the manual; service vacuum pump and dryer/desiccant; verify pressure and vacuum sensor readings; inspect air hoses for abrasion and outer-layer cracking. |
| Annually | Full mechanical inspection; replace wear parts due for renewal; test safety circuits and interlocks end to end; review and refresh spare-parts stock; schedule a supplier service visit if the manual recommends one; back up control recipes and settings. |
Spare parts to keep on site
Stocking the right wear parts avoids emergency expediting after the first failure. The exact list depends on the seal method and machine size, but the following parts belong on a standard erector’s spares shelf.
- Suction cups: a matched set for the pick arm, sized to the machine.
- Vacuum and air filters: filter elements for the vacuum path, filter and regulator cartridges for the air supply.
- Belts: the forming and outfeed belt sections most likely to wear, with matching fasteners.
- Folder parts: replacement springs, pins and blades for the flap folders.
- Seal kits: cylinder seal kits and rod seals for the pick and fold cylinders.
- Sensors: the flap, case-present and position sensors used on the machine, plus common fuses and connectors.
- Glue-system parts: nozzles, glue filters and hose washers for hot-melt builds; tape-head wear parts and blades for tape builds.
- Guide and wear strips: replaceable wear strips where guides contact blank edges or case sides.
Tracking performance and recurring faults
Maintenance decisions are easier when the line keeps simple operating metrics. Record jam events and stoppages against cases produced, so a jam rate per 1,000 cases shows whether a machine is deteriorating or a specific SKU is troublesome. Track first-pass seal yield: cases that form and seal correctly on the first attempt, without rework. Log changeover minutes per SKU and the split between planned and unplanned downtime, and note the cycle count at each cup or filter replacement so part life can be compared across machines.
A rising jam rate across several SKUs usually signals wear in cups, belts or guides; a rising defect rate concentrated on one seal method points to consumable or board compatibility rather than machine wear. Review the log monthly with maintenance and line supervision, and carry recurring faults back into the specification when the next machine is quoted. The guard and interlock side of safe maintenance is covered in the case erector safety and CE guarding guide.
Incoming blank quality and its effect on uptime
Many erector faults originate before the blank reaches the machine, and maintenance staff who treat every stoppage as a mechanical problem spend time chasing causes that sit in the board supply. Blank defects worth checking at intake include a crushed or torn score line, uneven flute height, printing that raises the surface, curled corners from moisture, warped panels from storage, and die-cut edges that do not match the drawn blank. A blank that has sat in a damp warehouse absorbs moisture along the edges, loses stiffness and can stick to the next sheet; a blank stored too dry can build static and pick up multiple sheets. Both conditions show up as pick failures or forming jams even when the machine is in good order.
- Store blanks flat, off the floor, and let them settle to plant temperature and humidity before feeding.
- Reject blanks with damaged scores, split corners or crushed flutes before they reach the magazine.
- Match board grade and flute to the case weight; a lighter board than specified will buckle or bulge in the forming section.
- Track defect rates by supplier and shipment, and feed repeated board problems back to procurement rather than adjusting the machine to compensate.
When a new blank design first runs, allow a short trial period before calling the machine out of spec. Fold geometry, flap dimensions and print registration can need small setup changes, and those should be recorded against the SKU so later changeovers start from the correct baseline. If the same blank fails on two different machines, the problem is almost certainly in the blank or its condition, not either erector.
Reading the uptime numbers
Jam rates and yield benchmarks vary by product and board, but the tracking method stays the same. Count stoppages that stop the cycle and the cases produced between them, then calculate jams per 1,000 cases and the share of cases that form and seal correctly on the first pass. A stable machine on uniform blanks should sit at a low jam rate with most cases passing first time; a trend upward over weeks, rather than a single bad shift, is the signal to inspect wear parts. Compare the same metric across machines and shifts so an operator technique gap or a board shipment stands out against normal background variation.
Keep the downtime log specific: station, fault code or symptom, suspected cause, action taken, parts replaced and cycle count. A log that only records “jam cleared” will not show whether cups, filters or belts are reaching the end of life, but a log that records the actual fix lets maintenance plan replacements in planned windows instead of reacting to stoppages. Review the log monthly with line supervision, and carry recurring faults back into the next specification or spare-parts review.
Common maintenance mistakes
Running cups past their life. A cracked lip loses vacuum before the cup falls off the arm; replacing cups on a condition or cycle schedule avoids repeated pick alarms and double feeds.
Ignoring board condition. Damp, curled or static-charged blanks cause the most avoidable pick and forming jams. Condition board before blaming the machine, and check humidity and storage where blanks wait in the magazine.
Skipping filter changes. Vacuum and air filters restrict flow gradually, so the machine can run slower for weeks before anyone records a fault. Stick to the filter interval rather than waiting for a total loss of suction.
Over-tightening guides. Guides set too tight bind the blank and cause jams that look like a seal or forming fault. Clearance follows the blank thickness, not a firm grip; loosen to spec if a case binds in the frame.
Cleaning glue systems with the wrong tools. Charred adhesive should be removed per the supplier procedure; sharp tools can damage nozzle seats and hoses, and overheating the melter degrades the adhesive faster. Flush on schedule rather than scraping after a clog.
Replacing sensors before checking the lens and wiring. Most sensor faults trace to a dirty lens, shifted target or loose connector. Clean and align first, inspect continuity second, and replace the sensor only after those checks pass.
How the erector fits the maintained line
An erector feeds formed cases to the loading station; downstream, a case sealer or carton sealing machine closes the top, and sections for strapping and palletizing may follow within an integrated packaging line. Shared conveyors need the same level of belt and nip-point inspection as the erector itself, and line downtime should be logged by station so the bottleneck is visible. The standard and medium-speed builds are listed in the case erector family, with the case erector 1, case erector 2 and medium-speed case erector showing the available layouts; the glue option is detailed on the hot-melt glue case erector page, and the nail closure option on the nail-type carton forming bottom sealing page.
For the seal-method comparison behind these maintenance notes, see the self-locking versus tape versus glue breakdown, and the supplier-side introduction in the SunAura hot-melt glue case erector launch. Budget and payback sit alongside uptime in the TCO guide, and compliance expectations are detailed in the safety and guarding reference. Questions about a specific fault, changeover or spare part can be sent through the contact desk with the machine model, case sizes and the fault code or symptom.