
Most band sealer faults show up in the seam before they show up as a broken part: a seal that peels apart at the center, a wrinkle running along the crease, a seam that opens an hour after packing, a date code that prints faint or doubled, or a PTFE belt that drifts off the roller. This post works through those symptoms in the order an operator should check them, pairs each cause with the adjustment or replacement that fixes it, and sets out a changeover procedure between bag types plus a preventive maintenance schedule. The machine stages referenced are described in the companion post on how a continuous band sealer works; the full build range sits on the band sealer product family page.
The troubleshooting logic below assumes a standard constant-motion band sealer running 0–12 m/min belt speed, an 8–10 mm seal width, a 0–300 °C heater pair of 0.7–0.9 kW, and a 40–90 W conveyor motor. High-volume and stainless line models share the same fault patterns; gas-flush variants add a purge manifold that has its own checks, covered in the nitrogen gas-flush band sealer post. If the question is which machine class suits the bag in the first place, the band sealer vs impulse sealer comparison and the TCO breakdown cover selection and purchase; the band sealer safety post covers the lock-out and cool-down steps required before working inside the track.
Read the seal before disassembling anything
The first diagnostic step is to inspect three or four rejected pouches at the sealing station, not to open the machine. Lay a pouch flat and look at the seam across its full width. A healthy seal on a 60–120 µm laminate shows a uniform, slightly compressed band of even gloss, with the embossed date code legible and no open channels along either edge. Peel a test seal by hand at a 180° angle: a sound seal reaches roughly 4–6 N/15 mm peel strength and tears film before the bond lets go; a weak seal splits cleanly between layers with little resistance. Note the film structure and thickness, the temperature setpoint, the belt speed, the bag dimensions and whether the fault appears on every pouch or only on some. That record narrows the cause to heat, pressure, belt alignment, film feed or coding before any tool is picked up.
Separate faults into four buckets. Heat faults show as weak seals at low temperature, burnt or creased seals at high temperature, or one cold side when a single element fails. Pressure and alignment faults show as wrinkles, off-center seams, or a seal that grips on one edge only. Feed faults show as folded pouches, product caught in the seal line, or bags entering the track at an angle. Coding faults leave the seam itself intact but make the date or batch mark faint, blurred or doubled. Working bucket by bucket keeps the operator from turning a temperature problem into a belt replacement that was never needed.
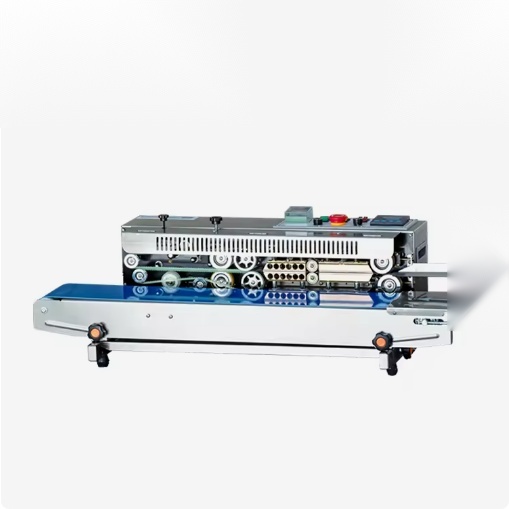
Symptom, cause and correction table
The table lists the faults seen most often on a packing station, the likely causes ranked from simplest to deepest, and the correction to try. Always follow the machine’s lock-out and cool-down sequence before reaching into the heater or roller zone; hot blocks remain above burn temperature for several minutes after shutdown.
| Symptom | Likely causes | Correction |
|---|---|---|
| Weak seal, peels apart at the center | Temperature too low for the film; belt speed too fast for heat dwell; worn or glazed PTFE belt; insufficient pressure between belts | Raise setpoint in 10–15 °C steps and test; lower speed to lengthen dwell; inspect and replace glazed belt; adjust belt tension and pressure springs |
| Seal wrinkles along the crease | Pouch entering at an angle; belt tracking off-center; uneven belt tension; product or film edge folded into the seam | Straighten feed guides; recenter the belt on the idler; balance upper and lower tension; clear product from the seal line and refold the pouch edge |
| Seal opens or delaminates after cooling | Insufficient cooling dwell; seal still hot when handled; film structure beyond the machine’s range | Slow the belt to extend cooling track time; let pouches rest before case packing; confirm film µm and laminate structure match the sealer rating |
| Burnt, browned or creased seal | Temperature too high; belt stalled over a hot block; film scrap stuck to the bar; dirty PTFE surface | Lower setpoint; check drive stops the belt when the machine idles; clean the block and belt backing; replace glazed or carbonized PTFE |
| One side of the seam cold or unbonded | Single heating element failed; loose element terminal; temperature sensor drift on one side | Isolate power, test element continuity and terminals, replace the failed element, verify sensor reading against a contact thermometer |
| Seal sits off-center on the pouch edge | Feed guide misaligned; pouch width changed without guide reset; belt shifted sideways | Reset side guides to the current pouch width; recenter belt; check guide lock screws after changeover |
| Faint, blurred or doubled date code | Coding ribbon dry or spent; print head pressure low; embossing wheel worn; belt speed mismatch to print feed | Replace ribbon or ink cartridge; set head spring pressure; inspect knurled wheel for worn digits; match print feed to belt speed |
| Belt wanders to one edge and rubs the frame | Idler roller out of alignment; tension uneven; roller bearing stiff; belt cut or stretched unevenly | Adjust idler alignment and equalize tension; free or replace a stiff bearing; replace a stretched or damaged belt |
Temperature faults and heater checks
Machine does not reach sealing temperature
When the readout climbs slowly or stalls well below the recipe setpoint, check in order: mains supply reaching the machine, heater circuit breaker or fuse, element continuity, and the temperature sensor. A heater pair of 0.7–0.9 kW should bring blocks from cold to working temperature in 3–5 minutes; if warm-up takes 10 minutes or more, one element may be open or drawing partial current. Test each element with a multimeter for resistance against the manufacturer’s rating; an open circuit means the element needs replacement. Loose element terminals read as intermittent heat and should be re-tightened after cool-down. A failing thermocouple or PT sensor can read low while the block runs hot, or read high while the block stays cold; verify the displayed temperature against a contact thermometer held on the block away from the sensor well.
Temperature drifts during the shift
Seals that start good and turn weak or burnt through a shift usually trace to control drift rather than film change. A PID controller holds setpoint within about ±5 °C when tuned; an analog dial wanders further as ambient air and mains voltage shift. Check that the sensor tip sits in its well without moving, that heater wiring is not loose, and that cooling fans run to keep control components below their rated temperature. On machines sealing above 220 °C, PTFE backing and tape degrade faster, which changes heat transfer to the film even when block temperature stays steady. Keep a log of setpoint, ambient temperature and seal quality across the shift; a drift that follows the room warming up points to sensor or control tuning, not the film.
Over-temperature trip or smolder risk
If the independent over-temperature cut-out trips, the machine should be held out of service until the cause is found: failed control relay sticking on, sensor failure, blocked cooling airflow, or film scraps accumulated against the block. Carbonized film residue on the PTFE belt insulates unevenly and can reach smolder temperature. Clear residue after cool-down, check the relay contacts and fan operation, and confirm the backup cut-out resets only after the blocks fall below its trip threshold. Do not bypass the over-temperature cut-out to keep production running; that protection exists to stop heater runaway before belt damage or fire.
Element, relay and sensor replacement notes
When an element tests open, replace it with the same wattage and voltage rating; an under-rated element runs cooler and cycles constantly, while an over-rated one drives block temperature past the PTFE and film limits. Disconnect power at the isolation switch before removing element terminals, label each wire before loosening it, and torque terminals to the manual’s specification so contact resistance does not build heat at the lug. The control relay that switches the heater wears with each cycle; contacts that pit or stick show up as a heater that stays on after the setpoint is reached or one that never switches on. A failed sensor usually reads erratically or reports a temperature far from the contact thermometer check; swap the sensor for a matched part, then let the machine warm through one full cycle before trusting the new reading. Record element and sensor swap dates in the machine file so the 3–5 year element life can be tracked against actual running hours.
Belt tracking and PTFE belt replacement
The upper and lower PTFE/PFE belts carry the pouch against the heated and cooled blocks. Tracking faults appear as the belt crawling toward one frame side, edge fraying, or a ridge of worn PTFE along one roller. Start with the idler roller adjustment: most frames carry a tracking screw that shifts one roller end to steer the belt. Equalize tension left and right after tracking, because an over-tightened side pulls the belt off center. Check that rollers spin freely; a stiff bearing drags one side and walks the belt sideways. Clean film residue and product dust from roller ends, since buildup changes roller diameter unevenly.
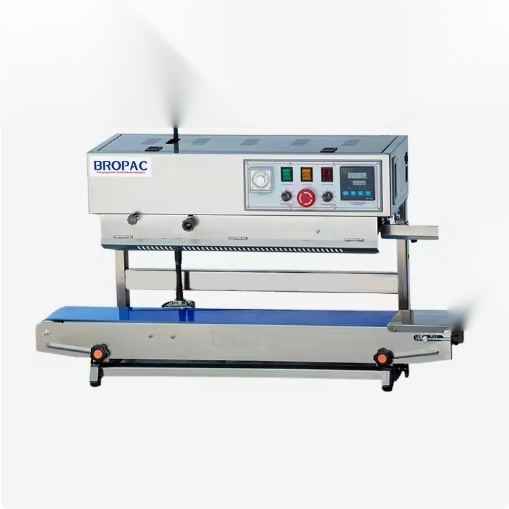
Belt life runs 6–12 months under single-shift duty at 180–220 °C, dropping to 3–6 months above 240 °C or on two-shift running. Signs that a belt needs replacement include a glazed or shiny surface that no longer grips, cuts or frayed edges, stretched sections that will not hold tension, and PTFE flaking onto the seal. Stocking one spare upper-and-lower set avoids a stopped line waiting on freight; replacement takes 30–90 minutes once the machine is isolated and cool. After fitting a new belt, run it empty for 5–10 minutes to settle tracking, then seal test pouches before returning to production. The stand heat band sealer and the vertical ink coding band sealer use the same belt-tracking logic on their respective feed orientations.
Film and pouch handling problems
Not every seal fault is a machine fault. Film structure sets the temperature window: polyethylene seals near 130–180 °C, polypropylene and common laminates near 160–230 °C, and thick foil or metallized laminates may need the upper end of that range plus longer dwell. A machine rated for 60–100 µm film will struggle on 120–200 µm stock, producing weak center seals no matter how high the temperature climbs; pushing the heater higher then burns the film edges. If a new film lot seals worse than the last one, compare thickness gauge readings and laminate structure before adjusting the machine.
Pouch-level faults come from how bags enter the track. A gusseted stand-up pouch that leans to one side seals a slanted seam; a flat pouch with a folded edge traps an air channel that opens into a leak path. Product resting on the seal line blocks belt pressure and leaves a localized weak spot. Side guides should be set to the pouch width without squeezing, and heavy fill weights should be settled away from the top edge before sealing. Static charge in dry weather pulls film scraps toward the belt and can make the pouch sit unevenly; a grounding strap on the frame and regular dust clearing reduce the effect. For valve coffee bags, check that the valve sits below the seal line so it does not sit between the belts; the coffee bag sealing machine listing covers that orientation in detail.
Fault patterns by product and film type
Dry snacks, granules and powders mostly generate feed and housekeeping faults. Powder dust settles under the track and on roller ends, changing tracking and insulating the belt; spills at the fill station ride into the seal line and leave a weak spot where product blocks pressure. Keep the feed-off area clean, check that product rests below the top edge before sealing, and vacuum dust from the track at each shift. Thin OPP or PE films under 60 µm seal at lower temperature and lower pressure; over-tight belt tension or a high setpoint wrinkles or burns these films before the operator sees a weak seal. If the same recipe worked last week on a different film lot, compare gauge thickness and sealant side orientation before changing machine settings.
Moist and oily products challenge the cooling section and the sealant bond. Residue on the pouch exterior near the seal line prevents the layers from welding, and moisture vaporizes at the block, leaving pinholes in the seam. These runs need a clean wipe of the seal edge before the track, a cooling track long enough to set the seal before handling, and a check that the film’s sealant layer is rated for greasy content. Oily condensate on the frame also accelerates belt degradation, so cleaning frequency rises with product fat content. Thick foil or metallized laminates, common for coffee and long-shelf-life snacks, carry heat away faster and need the upper part of the temperature window plus slower belt speed; a machine sized only for thin film will chase weak seals without reaching a stable recipe.
Valve bags and gas-flush pouches add two checks of their own. The one-way valve must sit below the seal line; if it rides between the belts, it blocks pressure and creates a channel along the seam. On a flush sealer, confirm the purge gas flows before the pouch reaches the heater and that the seal forms after the headspace is settled; a weak seal on a flushed bag can trace to gas turbulence pushing film apart at the block rather than to low heater temperature. Purge rate and flow timing for the gas-flush build are covered in the nitrogen gas-flush band sealer product listing. Vacuum chamber packing is a different machine family; where a pouch needs evacuated headspace rather than a surface seal, the chamber sealer, not the band sealer, is the correct equipment.
Date coding and embossing wheel faults
The coding station sits after the cooling section, so a bad date mark leaves the seal itself intact. On an embossing wheel, digits press into the film by pressure; faint marks mean low spring pressure, a worn knurled wheel, or belt speed carrying the pouch through faster than the wheel impression can form. On solid-ink or ribbon coding, faded print points to a spent ribbon, dry ink supply or low head pressure; doubled or shifted print points to the print feed not matching belt speed or a loose head mount. Clean the print head per the supplier’s interval, replace the ribbon or cartridge when the mark lightens, and inspect the embossing wheel for worn digits after several hundred thousand impressions. Coding parts are cheap relative to a rejected batch, so they belong on the shelf alongside belts and tape.
Changeover between bag types
A structured changeover keeps first-piece rejects low when switching pouch widths, film structures or fill products. Run the steps in order, and record the recipe values so the next changeover back to the previous bag does not start from guesswork.
- Stop production, clear the track, isolate power and let blocks cool before any guide or belt adjustment.
- Record the old recipe: film structure and µm, pouch L/W in mm, temperature setpoint, belt speed m/min, seal width, belt height and coding setting.
- Set side guides and belt height to the new pouch dimensions; confirm the pouch passes straight through without leaning.
- Enter the new film’s temperature window and start at the midpoint; set belt speed to match required dwell for the thicker film.
- Fit the correct coding setup for the new bag and load the current date or batch mark.
- Run 10–30 test pouches through empty or with dummy product; inspect seam width, gloss and edge bonding, then peel-test three seals to the 4–6 N/15 mm target.
- Adjust temperature in 10–15 °C steps or speed in 1–2 m/min steps until the test seals hold; record the accepted recipe.
- Approve the first production pouch, then monitor the first 50–100 pouches for drift before leaving the station unattended.
Changeover scrap runs highest in the first 10–30 seals; experienced plants budget 0.5–2% of pouches as setup scrap. Two bag formats that share a frame but differ in orientation need the machine switched between horizontal and vertical feed; the stand 2-in-1 band sealer handles both on one frame, and the horizontal ink printing band sealer and vertical ink coding band sealer show the two dedicated orientations. Keeping a printed recipe card at each station cuts changeover time and repeat mistakes.
Preventive maintenance schedule
Preventive work lowers the fault rate above. The schedule below matches a single-shift food or snack packing station; double the consumable inspection frequency on two- or three-shift running, and shorten intervals where seal temperature stays above 220 °C.
| Interval | Tasks | Wear part checked |
|---|---|---|
| Each shift (daily) | Clear film scraps and dust under the track; inspect seam quality on running pouches; check belt tracking and surface condition; verify e-stop cuts heater and belt; confirm coding legibility | PTFE belt surface, embossing/print mark |
| Weekly | Wipe heater housing and roller ends; check guide lock screws and belt tension; test idle stop: belt halts when feed stops; clean coding head and inspect ribbon | Belt tension, guides, coding supplies |
| Monthly | Verify block temperature against a contact thermometer; test interlock and e-stop reset sequence; inspect element wiring and terminals; lubricate bearings per manual; check earth bonding | Heater elements, sensor, switches, bearings |
| Every 6 months | Replace PTFE sealing tape; inspect rollers and bearings for stiffness; check drive chain or belt; inspect PTFE belts for glaze and stretch; review spare parts stock | Sealing tape, rollers, drive, belts |
| Annually | Service heater elements and temperature sensor; replace aged belts if near wear limit; inspect frame, guards and fasteners; check control enclosure and cable insulation; record results in the machine file | Elements, sensor, belts, guards, cables |
Expected wear life under single-shift duty: PTFE belts 6–12 months, sealing tape roughly monthly, heating elements 3–5 years, embossing wheel several hundred thousand impressions, coding ribbon or ink supply per packaging consumption, and drive motor 40–90 W rated for continuous duty with bearing service at the annual interval. A machine that holds its recipe and seal quality across these intervals is showing normal wear; one that needs belt or element replacement well inside those limits usually points to over-temperature running, mis-tracked belts or missed cleaning, and the cause should be logged rather than the part simply swapped.
Spare parts worth keeping on the shelf
- One spare set of upper and lower PTFE belts sized to the frame width.
- PTFE sealing tape rolls for the heat bars or belt backing.
- One spare heating element of the correct rating, plus fuses for the heater and control circuits.
- Temperature sensor matching the controller type.
- Knurled embossing wheel and coding ribbon or ink cartridge for the installed coding option.
- Idler and drive bearings that show stiffness first on a tracked belt.
Keep spares labeled with the machine model and part number, and note the lead time for anything the supplier does not stock locally. A belt or element wait measured in weeks on a critical seal station turns a small fault into a dispatch delay; the automatic continuous band sealer and SF150LD professional band sealer listings identify the standard wear parts for those builds.
When to fix in-house and when to call service
Operators and a trained maintenance lead can handle recipe changes, guide and tracking adjustment, belt and tape replacement, ribbon changes, sensor and element swap, and routine cleaning when the lock-out and cool-down steps are followed. Call the supplier or a service engineer for control-board faults, motor or gearbox failure, interlock circuit redesign, repeated element burnout that points to a wiring or relay defect, and any machine that will not hold temperature after sensors and elements test clean. Describe the symptom with the recorded values: film µm and structure, setpoint, speed, which pouches fail, and what has already been checked. That short record lets service isolate whether the fault is heat, pressure, drive or coding without a second site visit.
Keeping a fault and recipe log
A short running log per machine turns one-off fixes into a pattern record. Each entry notes the date, pouch and film, reported symptom, recorded setpoint and speed, the adjustment or part replaced, and the seal quality after the fix. Over a few months the log shows whether a particular film lot consistently needs a higher temperature, whether one station’s belts wear faster than others, and which faults repeat before a scheduled service. Recipe cards for each bag format pull from the same log, so a changeover does not depend on the operator who first tuned the machine. The log also gives the service engineer a history when a fault recurs that in-house checks do not resolve, and it feeds the annual review of spare-part stock and wear intervals.
Related references across the cluster
Troubleshooting sits alongside selection, mechanics, compliance and cost in this cluster. The band sealer vs impulse sealer comparison explains when constant-motion sealing is the right match against manual jaw sealing; the technical deep dive details heater blocks, PTFE belts, the cooling section and date coding with temperature and speed numbers; the gas-flush band sealer overview covers purge manifold checks for inert-gas packing; the TCO breakdown prices consumable wear, power and labor over the machine’s service life; and the safety and CE compliance post sets the guarding, e-stop and lock-out rules that apply before service work begins.
SunAura supplies the continuous band sealer family in horizontal, vertical, 2-in-1 and gas-flush builds, with belts, tapes, elements and coding parts listed alongside each model. Buyers can review the band sealer product range, check the certifications and patents overview, read recent equipment notes in the news section, or send fault details, film spec and pouch dimensions through the contact page for troubleshooting support and spare-part identification. The about-us page outlines the workshop and export support behind the machine supply.