
Inside the constant-motion seal: what carries the bag, melts the film and sets the seam
A continuous band sealer closes a pre-made bag or pouch without a jaw opening and closing. The filled pouch enters at the inlet, two PTFE-coated conveyor belts grip the open seam and pull it through the machine in a straight line, a pair of heated blocks melts the inner sealant layer while the seam moves, cooling blocks set the softened joint under pressure, and a knurled embossing or date-coding wheel marks the finished seal before the pouch leaves the discharge. Every part of that path exists to solve one problem: applying heat and pressure to a moving film long enough to bond the sealant, then removing the heat before the pouch leaves the machine, so the joint does not stretch or reopen under the fill weight.
This walkthrough follows the pouch through the machine in the order it travels: inlet guides and belt drive, heating blocks and temperature control, the cooling section, the embossing and coding station, then the frame, stand and electrical layout. Each subsystem section carries the numbers a buyer or maintenance engineer should verify on a quotation: belt speed in m/min, heater load in kW, working temperature in °C, film thickness in µm, seal width in mm, motor power in W, bag dimension ranges and the service life of wear parts. The aim is to explain how the seal forms, where each adjustment acts, and which spec figures are real operating limits rather than brochure peaks.
The reference figures are the standard bands on the SunAura band-sealer range: belt speed 0–12 m/min, seal width 8–12 mm (10 mm typical), thermostat dial 0–300 °C with sealing usually set 120–200 °C, heater load 0.6–1.0 kW, drive motor 60–120 W, cooling fan 20–40 W, warm-up 3–8 minutes, film 60–120 µm laminated pouches and single-layer PE to about 200 µm on matched frames, horizontal bag width up to roughly 400–500 mm and pouch thickness 5–350 mm. Treat these as starting windows; your own film, fill weight and room temperature set the final setting during a trial seal.
The sealing path in one pass
Trace a pouch from inlet to discharge. At the feed end, adjustable side guides center the open seam between the two belt runs. The top and bottom PTFE belts meet at the nip; spring pressure holds the belt runs together so the seam is gripped without being crushed. The belt drive moves the pouch at a set linear speed. First contact with the heat station: the heated blocks press the two belt runs together over a fixed contact length, and the sealant layers on the inner faces of the film melt where they touch. The pouch continues into the cooling section, where cooled blocks or an air-cooled belt run chill the joint under pressure while the sealant re-solidifies. Behind the cooler, the embossing wheel presses a knurled texture and often a date or batch code into the seam; ink-coding versions print after cooling. The finished pouch exits onto a discharge chute or conveyor.
Three conditions have to hold at once for a good seal: the sealant must reach its melt temperature across the full seam width, the film faces must stay flat and in contact under pressure for the full contact length, and the joint must be held closed until the sealant has set. The belt supplies the transport and the pressure; the heater supplies the melt temperature; the cooler supplies the set time. If any one of the three drifts, the seal shows a specific fault: under-temperature gives a weak peel, uneven pressure gives wrinkled or corner-open seams, and leaving the heat before cooling gives a stretched or reopened joint. The subsystem descriptions below map each adjustment to the condition it controls.
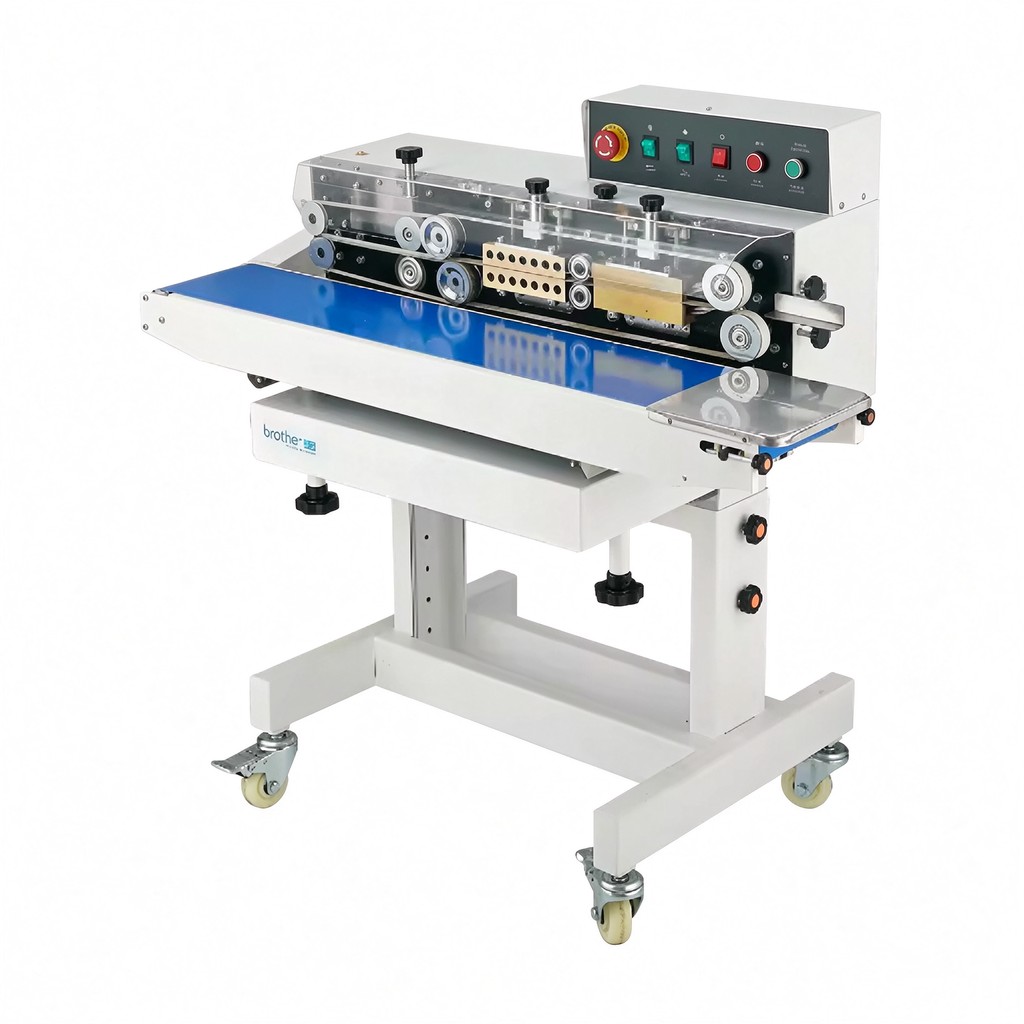
Conveyor belts and drive: transport, grip and tracking
The belt pair is the machine’s transport and its pressure surface. Each belt is a PTFE or PFE-coated fiberglass fabric running over end drums; the coating withstands contact with the hot blocks and releases film that touches the seam. Two belt runs, one above and one below, sandwich the pouch seam. The drive is a gear motor, typically 60–120 W, turning the end drum through a reduction gear; belt speed is adjusted by a potentiometer or small inverter and shown on a speed dial or digital readout. Linear speed runs 0–12 m/min across the range, with most food pouches sealed between 4 and 10 m/min.
Belt tracking decides whether the seam runs straight through the heat station. Each end drum carries a tracking adjustment, usually a knob or screw that tilts the drum end; the belt must run centered on the drum face, not riding the edge. Side springs set the nip pressure between the two belt runs: enough to grip the seam and hold it flat, not so tight that a thick gusset is pinched or the belt wears at the edges. A belt that wanders drifts off the block contact, and the seal loses pressure on one side; a belt that rides the drum edge frays the PTFE coating within weeks rather than months.
The throat dimension sets the bag range. Horizontal frames accept pouch thicknesses from about 5 mm to 350 mm between the belt runs, and seal pouch widths up to roughly 400–500 mm depending on block length. Bulging or heavy bags that cannot lie flat go to a vertical frame, where the belt run is upright and the bag hangs or stands below the throat, supported by a back conveyor. Belt service life runs 6–12 months under normal food-film use; dusty, oily or heavily printed stock glazes the coating faster and shortens that to 3–6 months. Cleaning the PTFE surface of film fuzz and checking tracking weekly are the two tasks that protect belt life. Belt replacement involves threading the new belt through the guides, re-tensioning and re-tracking before the next run.
Heating blocks and temperature control: where the sealant melts
The heat station is a pair of heated blocks, one on each belt run, positioned opposite each other so the belt and film pass between them. Blocks are usually cast aluminum or stainless housings with an embedded resistance heater and a thermocouple or thermistor that reads block surface temperature. Total heater load runs 0.6–1.0 kW across the range; a single block heater sits around 0.3–0.5 kW. The thermostat holds the block near the set point, typically within ±5–10 °C, and the dial covers 0–300 °C even though most sealing work lands between 120 and 200 °C.
Contact length matters as much as temperature. The block presses on the seam over a fixed length along the belt direction, commonly 60–120 mm. At a given belt speed, that contact length sets how long the film spends in the heat station: a 100 mm contact at 6 m/min (100 mm/s) gives about 1.0 s of heat exposure; at 12 m/min (200 mm/s) the same contact gives 0.5 s. Thicker laminates and metallized stock need the longer exposure, which means slower belt speed rather than a higher block temperature; pushing the temperature up to compensate for speed burns the outer film layer before the sealant melts through.
Warm-up at start of shift takes 3–8 minutes depending on block size and room temperature. The machine should reach set point and hold for a few minutes before the first production pouch, because a block that reads temperature at the surface can still be uneven inside. A standby setting either shuts the heater down between short runs or holds a lower idle temperature; check which your frame does, because the idle heat load shows up on the power bill across a shift with frequent pauses. Temperature faults — weak seals that track a cold block, or scorch marks that track a hot one — are read against the thermocouple reading, not guessed from the dial position.
Cooling section: setting the joint before it leaves pressure
After the heater, the softened sealant is still molten and the seam must stay closed until it re-solidifies. The cooling section runs the pouch between cooled blocks or an air-cooled belt section for another 40–80 mm of contact. Some frames use finned blocks with a small fan (20–40 W) drawing room air over the housing; others rely on block mass and ambient air to pull the temperature down. The pressure stays on through this section so the two film faces cannot separate while the sealant sets.
A seal that looks bonded at the heater can reopen if the pouch leaves the machine before the joint sets: the still-soft seam stretches under the fill weight, the two faces pull apart at a corner, and the pack leaks in storage. The cooling section is what prevents that. If production shows reopened or stretched seals even when the heat setting looks right, the likely causes are belt speed too high for the cooler contact length, a blocked cooling fan, or a cooling block coated in film residue that insulates the joint. Cross-check those before changing the heater temperature.
Embossing wheel and date coding
Behind the cooler, a spring-loaded knurled steel wheel presses a texture into the finished seam. The emboss pattern breaks up the smooth seal surface and gives a visual check that the seam has been pressed; on most frames the wheel also carries changeable character dies that stamp a production date, batch number or line code into the seal. The wheel sits after the cooling section so it marks a set joint, not a soft one. Embossing depth is set by wheel spring pressure: too light and the code fades after a few days, too deep and the wheel cuts into the sealant and weakens the peel line.
Ink-coding frames add a coding unit after the emboss station: a roller ink pad or small ink marker prints the date and batch in ink on the belt or directly on the film. Ink units need the correct ink grade for the film surface — porous kraft, glossy OPP and metallized PET take different inks — and the pad or roller needs topping up or cleaning between runs. The vertical and horizontal ink-coding variants in the product range differ mainly in frame orientation and coding position; the heat, cool and belt subsystems work the same way.
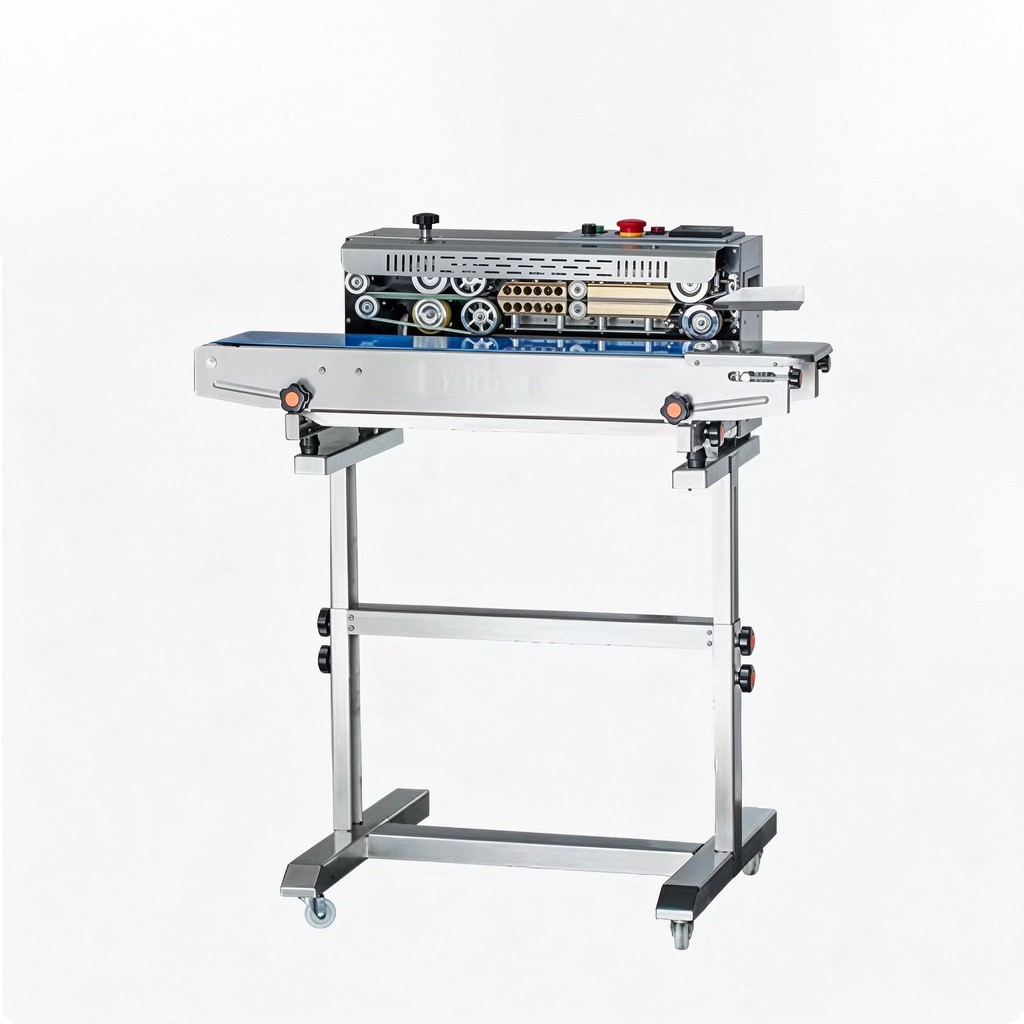
Tuning temperature and speed by film type
The two working variables the operator sets for each film are block temperature and belt speed. Seal width is fixed by the block and belt contact, usually 10 mm, and pressure is set at installation. The table below gives starting windows for common pouch structures; run a trial seal on your own stock, peel a test strip, and adjust in small steps — 10–15 °C or 1 m/min at a time — rather than moving both settings together.
| Film structure | Thickness range | Block temperature | Belt speed | Seal note |
|---|---|---|---|---|
| Single-layer PE bags | 30–100 µm | 130–160 °C | 8–12 m/min | Wide heat window; watch for PE thinning at the seam on thin stock |
| PP / OPP bags and wraps | 40–80 µm | 150–180 °C | 6–10 m/min | Higher melt point; cool fully before discharge to avoid film shrink |
| PET/PE laminate (snacks, dry goods) | 60–120 µm | 160–190 °C | 5–9 m/min | Seal the inner PE layer; keep PET outer layer from shrinking or clouding |
| PET/AL/PE coffee and nut pouch | 80–120 µm | 170–200 °C | 4–8 m/min | Longer contact; metallized layer reflects heat, so rely on exposure time |
| Thick PE or gusseted bags | 120–200 µm | 150–180 °C | 4–7 m/min | Slow speed for heat penetration; confirm seal holds fill weight after cooling |
Read a weak seal in order of cause. If the bond peels apart cleanly with film intact, the sealant never melted: raise temperature 10–15 °C or slow the belt 1 m/min to extend contact. If the film tears but the seal pulls away at one edge, pressure or tracking is uneven: check belt alignment, spring tension and guide centering. If the seam looks glossy or scorched and the sealant squeezes out, the block is too hot or the speed too slow: lower temperature or raise speed. If the joint opens after discharge despite a bonded-looking seam, the cooling section did not set the sealant: check the fan, the cooling block contact and the belt speed against cooler length.
Reading the spec sheet: rated figures versus sustained operation
A band-sealer specification lists a maximum belt speed and a maximum bags/min, but those peaks are measured on the shortest pouch pitch and the easiest film in the range. Your sustained rate should be planned at 70–80% of that figure across a shift, leaving headroom for misfeeds, film changes and short stops. Bags/min converts from belt speed and pouch pitch: at 6 m/min (100 mm/s), a 150 mm pitch gives about 66 bags/min; a 300 mm pitch gives about 33 bags/min. Use your real pouch length to convert, not the brochure bags/min number.
Duty cycle and ambient conditions belong on the spec sheet too. A frame rated for intermittent use cycles through short runs with pauses; a two-shift food line needs a frame whose heater, motor and belts hold up under continuous duty. Room temperature, dust, moisture and washdown exposure decide the enclosure rating and the finish: dry warehouse packing, dusty spice or flour lines, and wet washdown rooms call out different belt materials, electrical protection and surface finishes. Bag weight and orientation decide horizontal versus vertical frame; a spec that lists only pouch width will not catch a heavy upright bag that needs vertical support.
| Subsystem | Typical spec band | What to verify on the quotation |
|---|---|---|
| Belt drive motor | 60–120 W gear motor | Speed control type, speed readout, motor duty rating for your shift pattern |
| Belt speed | 0–12 m/min, variable | Linear speed shown on dial or display; minimum stable speed for thick laminates |
| PTFE belts | PTFE/PFE-coated fiberglass, 6–12 month life | Belt width, replacement part availability, tracking adjustment access |
| Heating blocks | 0.6–1.0 kW total, 0–300 °C dial | Thermocouple type, temperature accuracy, standby heat behavior, contact length |
| Cooling section | Air-cooled blocks or fan, 20–40 W fan | Cooling contact length, fan access for cleaning, whether blocks are water-cooled on heavy frames |
| Embossing / coding | Knurled wheel with date dies; ink option | Die character set, emboss depth adjustment, ink grade matched to your film |
| Bag range | Horizontal: width to 400–500 mm, thickness 5–350 mm | Your smallest and largest pouch, fill weight, upright or flat orientation |
| Power supply | 220 V/50 Hz or 110 V/60 Hz, heater plus motor plus fan | Supply voltage at the install point, standby draw, plug or hardwired connection |
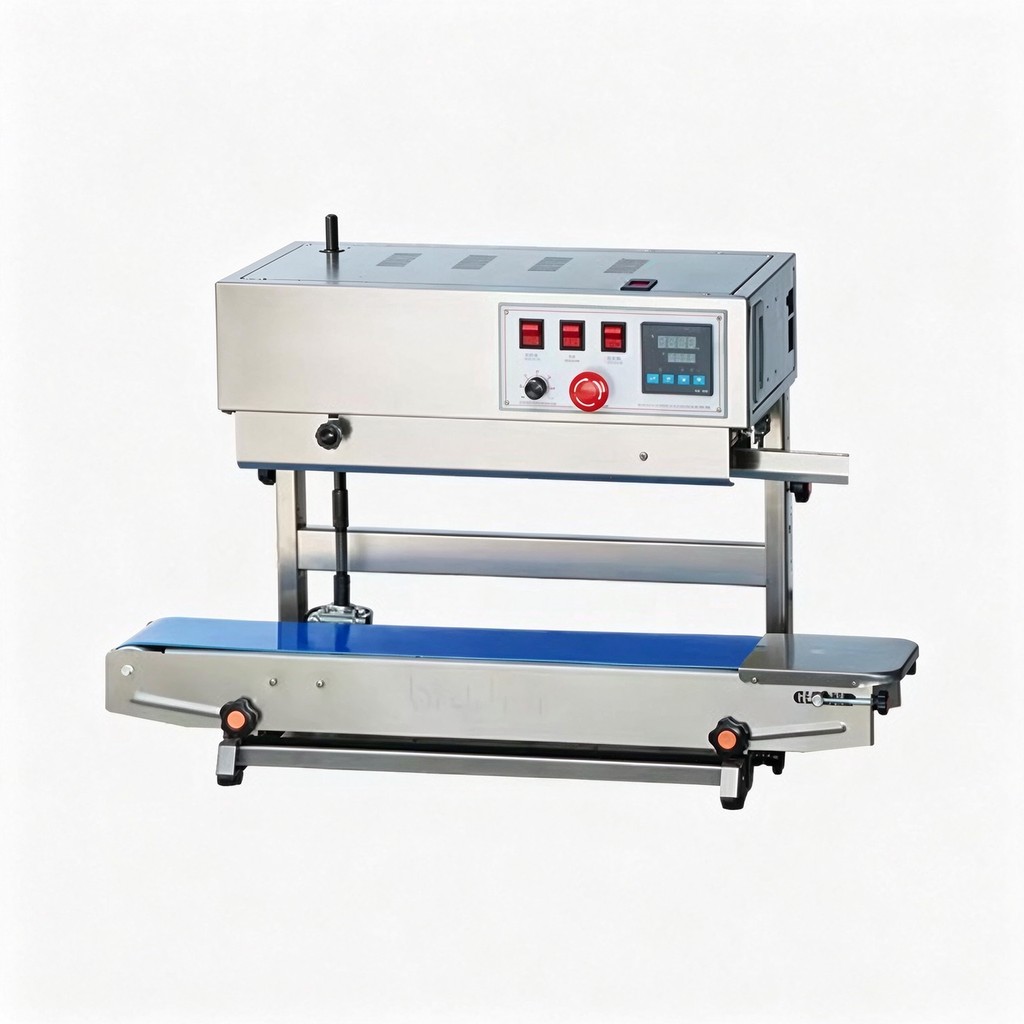
Setup sequence for a new film or format
- Measure the pouch: width, gusset depth, seal length, film structure and thickness in µm, fill weight. Confirm the frame orientation matches whether the bag lies flat or stands upright.
- Set the inlet guides to the pouch width and the belt nip pressure so the seam grips flat without pinching the gusset.
- Switch on the heater and set the starting temperature from the film window table. Allow 3–8 minutes warm-up and hold at set point for a few minutes before sealing.
- Set belt speed to the starting window for the film. Thread or confirm the belt tracks centered on the drums.
- Run three to five trial pouches. Inspect the seam for a uniform 8–10 mm bond band, no wrinkles, no open corners, no scorch or squeeze-out.
- Peel a 15 mm test strip after full cooling. Target 4–6 N/15 mm; adjust temperature by 10–15 °C or speed by 1 m/min between trials, one variable at a time.
- Set the embossing characters to the date or batch code and check the imprint is legible on the seam without cutting into the sealant.
- Record the final temperature, speed, pressure and film lot on the machine sheet so the next run returns to the same setting.
Where faults start, and where the safety limits sit
Most band-sealer faults trace to one of the four subsystems: belt tracking and pressure, heater temperature, cooling contact, or coding pressure. Wrinkled seams, weak corner bonds, glazed belts, temperature drift and misfeeds each have a defined check order; the band sealer troubleshooting and changeover guide walks through those faults, the maintenance schedule and format changeover steps, so this post does not repeat the fault tree in full.
The hot blocks, moving belts and nip points carry their own safety limits. Guards cover the belt runs and hot surfaces, the emergency stop cuts drive and heater power from the operator position, and inlet and discharge openings are sized so fingers cannot reach the nip. Food-room installations also need product-contact materials and washable finishes matched to the cleaning regime. The guarding, interlock, burn-risk and CE compliance points are detailed in the band sealer safety and CE compliance guide; do not run the machine with belt covers removed or bypassed to clear a jam.
Frame types: bench, stand and vertical
The same heat, cool and belt subsystems are built into three frame orientations, and the choice is set by how the bag sits and how heavy the fill is. A horizontal bench frame is the compact body without a stand: the belt runs level across a tabletop, the operator lays flat pouches into the inlet, and the sealed pouch drops to a chute or packing bench. This frame suits small flat bags, low-to-moderate volume and rooms where floor space is tight. It has no back support for a bulging pouch, so gusseted or heavy bags do not feed cleanly even if the seal itself would hold.
A stand frame lifts the belt to operator working height on a painted or stainless leg set, often on casters so the machine can roll between lines. The stand positions the inlet at waist height for one person feeding pouches, and the discharge drops to a packing station or downstream conveyor. Stand frames carry the control box, temperature readout and speed control on the side panel within reach of the feed position. This is the common frame for single-shift food, snack and dry-goods packing where the bag lies flat but the volume does not justify an inline automatic body.
A vertical frame runs the belt pair upright. The bag enters with its open top toward the belts, and the filled body hangs below the throat or rests on a back support conveyor, so heavy, wet or bulging packs are held upright while the seam seals. Vertical frames are specified for pet food, rice and grain bags, soup or sauce pouches, and any fill over roughly 1 kg that would pull a horizontal seam open under its own weight. The vertical body also adds a back guide and often a longer throat to clear the bag depth. Where the product needs oxygen exclusion, a gas-flush manifold sits ahead of the heat station on either orientation; that variant is described in the nitrogen gas-flush band sealer overview.
Electrical layout and the circuits behind the controls
The machine’s electrical side splits into three loads: the heater, the drive motor and the cooling fan, each switched through its own contactor or relay under the control panel. The heater circuit carries the 0.6–1.0 kW block load through a thermostat or temperature controller that reads the thermocouple signal and cycles the contactor to hold set point. The motor circuit runs the 60–120 W gear motor through the speed control; the fan runs whenever the heater is on or whenever the belts move, depending on frame wiring. The emergency stop breaks the control circuit so both heater and motor drop out when it is pressed, rather than cutting only the drive.
Supply voltage matches the install point: most frames run 220 V/50 Hz, with 110 V/60 Hz variants for North American outlets. Confirm the heater load against the circuit rating before install, because a 1 kW heater on a shared circuit with other equipment can trip under warm-up. Wiring should keep the thermocouple leads away from the heater power cables so the temperature reading does not pick up interference; a wandering temperature readout that does not match the block condition often traces to sensor lead routing or a loose thermocouple connection. Enclosure rating and surface finish are set by the room: dry warehouse packing, dusty processing, and wet washdown each call for a different protection level, and that should be written into the order rather than added after installation.
Related machines and further reading
The continuous band sealer product family lists the frames built around this sealing path: the automatic continuous band sealer for line-fed pouches, the SF150LD professional band sealer for general food and snack packing, the stand-mounted heat band sealer, the 2-in-1 stand band sealer with digital readouts, the horizontal ink-printing band sealer, the vertical ink-coding band sealer for heavy upright bags, and the coffee bag sealing machine for valve and kraft coffee pouches.
For the buying side, the band sealer versus impulse sealer comparison sets constant-motion sealing against manual jaw sealing by material, throughput and consistency. Where oxygen exclusion is required, the nitrogen gas-flush band sealer overview explains the inert-gas purge station added ahead of the heat seal. The band sealer cost and TCO breakdown covers machine price bands, PTFE and film wear, power and labor over five years.
Send pouch samples, film specification and target rate through the contact desk for a trial seal and a matched frame configuration. The certifications and patents section lists the compliance documentation available with the machine, and the company profile covers the wider packaging equipment range.